


A Practical Guide to Building a Falcon Foundry App for the First Time
Developers and professionals who work within the cybersecurity industry are constantly looking to create more dynamic and impactful integrations between CrowdStrike’s Falcon platform and other security and IT tools. In order to help better facilitate that, CrowdStrike has introduced Falcon Foundry.
The Falcon platform has numerous modules with analytic and response features to hunt and defend against today’s adversaries. Now you can develop custom solutions to extend the power of the Falcon platform to your specific needs by leveraging Falcon Foundry. Falcon Foundry, cybersecurity’s first low-code application platform, gives you the ability to build apps, extensions, and API integrations to leverage additional organizational detail within the Falcon console. You can also increase awareness and expand visibility using Falcon Next-Gen SIEM to ingest additional third-party data sources.
In this tutorial, you will learn how to build your first Foundry UI extension. This is a relatively simple example, enabling you to learn quite a few fundamental Foundry concepts. I’ll show you how to use the Foundry CLI, run your application in development mode, and install the application to your Falcon console so users may access it. CrowdStrike customers with Falcon Prevent or Falcon Insight XDR entitlements can build and deploy one Falcon Foundry app at no additional cost.
Prerequisites:
- Falcon Insight XDR or Falcon Prevent (one app)
- Falcon Next-Gen SIEM or Falcon Foundry (1+ apps depending on entitlement)
- The latest version of the Foundry CLI
- An internet connection
You can install the latest version of Foundry CLI with Homebrew on Linux/macOS.
brew tap crowdstrike/foundry-cli
brew install foundry
If you’re on Windows, download the latest Windows zip file, expand it, and add the installation directory to your PATH environment variable.
Run the following command to confirm you have it installed correctly:
foundry version
What is Falcon Foundry?
Falcon Foundry is a low-code application platform, which means that you don’t have to write a lot of code to build applications. We’re working on adding no-code support to Foundry too, meaning you will soon be able to build your application using the Foundry App Builder without needing to code at all.
There are a few modes you’ll see while doing this tutorial:
- Development: Run an app on your local machine. View it in your browser or from the Falcon UI.
- Preview: Allows you to view a deployed app in the Falcon UI before releasing it.
You can also deploy apps to the Falcon console, which means you can:
- Deploy and Release: Publish a deployed app into the App catalog.
- Install: Install a released app via the App catalog.
You’ll also need a CID, or Customer ID, to work with. If you’d rather not develop in your production instance, you can create a developer CID. See the Foundry documentation for more information about this.
Create a “Hello World” App
To begin, log in to Foundry:
foundry login
You don’t need to select any permissions for this tutorial. Click Authorize Foundry CLI to continue.
This process sets up a new CLI profile and generates an API client ID and secret pair. If you want to set up another profile for an additional CID, change to that one first, then run the command again. You can use foundry profile activate to switch between profiles.
Navigate to a place where you like to keep code on your system. Then, create a new Foundry app:
foundry apps create
Provide the following values when prompted:
- Use app templates?
No - Name:
foundry-quickstart - Description:
My First Foundry app - Logo: <
skip> - Vendor: <
skip> - Vendor Product: <
skip> - Use Case:
Endpoint security
The result should look similar to the following:

Your new app directory contains only a single file, manifest.yml. This file is your app’s deployment descriptor. As you add capabilities to your app, subdirectories will be created, and this file will be updated.
Add a UI Extension
A UI extension is an app that will be rendered only in certain areas of existing Falcon pages. Create one with the commands below:
cd foundry-quickstart
foundry ui extensions create
Provide the values below:
- Which template?
Vanilla JS - Name:
My First Extension - Description:
UI extension for Endpoint Detections page - Sockets:
Endpoint detection details
The screenshot below shows how this might look in your terminal:

You might be asking, what is a Socket? Sockets are predefined locations within the Falcon console where your extension can be rendered.

Selecting Endpoint detection details means that your app will be rendered on the Endpoint security > Monitor > Endpoint detections page in the Falcon console. When a Falcon console user selects an endpoint’s detection to see its details, your app will be displayed in this panel alongside the existing detection details CrowdStrike already provides.
You can use the tree command to see the directory structure and files in the project.
$ tree .
.
├── manifest.yml
└── ui
    └── extensions
        └── My First Extension
            ├── LICENSE
            ├── README.md
            └── src
                ├── app.js
                └── index.html
Run the App Locally
Log in to Falcon and enable Development mode. You can do this by selecting the </> icon in the navbar and toggling it on.
Run your app locally using the following command in the foundry-quickstart directory:
foundry ui run
NOTE: This will start a local webserver on port 25678.
Navigate to Next-Gen SIEM > Detections or Endpoint security > Monitor > Endpoint detection .
NOTE: If you’re redirected back to the dashboard, it means you don’t have the feature.
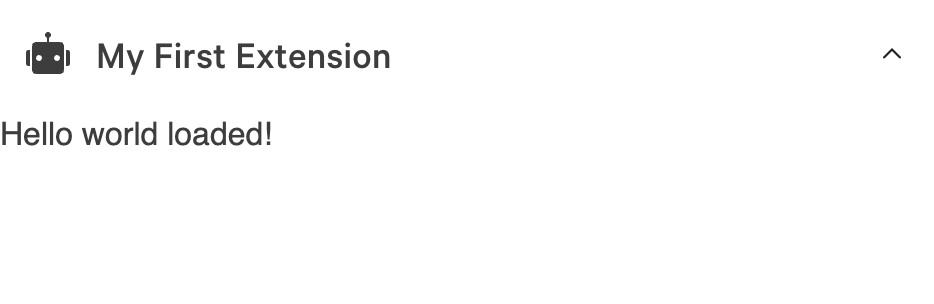
Select any of the detections to open the details panel. Scroll down, and you will see your extension listed near the bottom. Expand it, and you should see “Hello world loaded!”
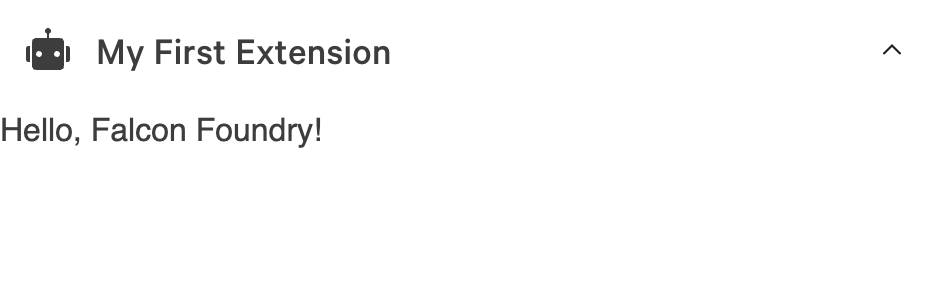
The Foundry platform is in development mode, which means it has an open connection to your local machine. This means you can edit ui/extensions/My First Extension/src/app.js in your favorite editor, and you can see the changes right away. For example, I changed mine to say “Hello, Falcon Foundry!”, and saved the file. My changes were reflected immediately. Pretty slick, eh?
It’s nice to be able to develop this way locally. Now let’s deploy it to your Falcon console so others in your organization can see it. Stop the foundry ui run command with Ctrl+C.
Deploy the App to Foundry
Deploying your changes to the Foundry module within the Falcon console will save and push the code. This makes it possible to collaborate with others and use versioning. You can see previous deployments from the Foundry > App manager and access any deployment change logs.
Deploy the app to Foundry using the following command:
foundry apps deploy
This will prompt you for the change type and changelog:
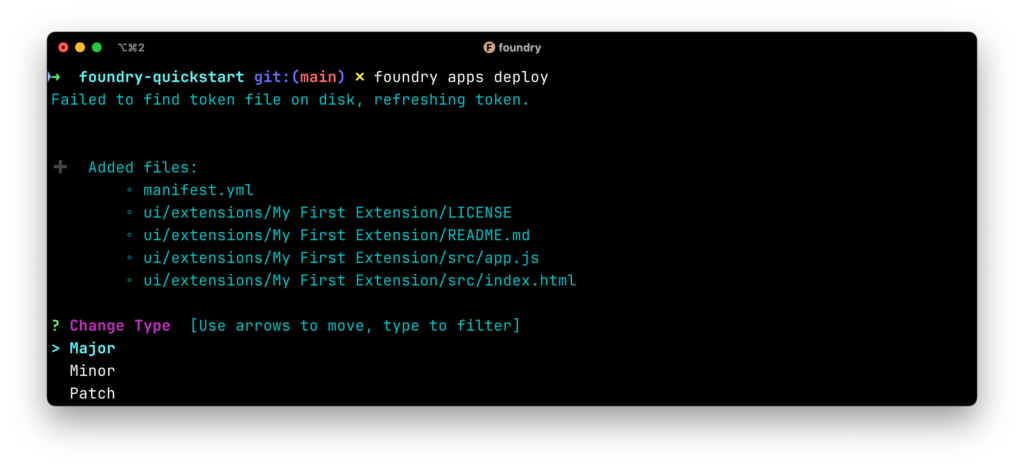
Select Major and type in anything you’d like (e.g., “Initial deployment with UI extension”) in the change log.
NOTE: If you get an error that the name already exists, change the name to something unique in manifest.yml.
Preview the App
After deploying the app, you can preview it before you release or install it for everyone to see. Go to Developer tools in the navbar (the </> icon). Toggle development mode off and turn preview mode on.
Now if you navigate back to the detections page (Next-Gen SIEM > Detections OR Endpoint security > Endpoint detections), you’ll be able to see your extension without running anything locally.
Preview mode is a useful developer option that enables you to test apps with UI features (dashboards, extensions, pages, and navigation) before releasing them.
Go to Developer tools and turn off Preview mode.
Release the App on Foundry
Once you are done developing your app and you’re ready to share it with others in your organization, you can release it. This will list the app in Foundry > App catalog within your Falcon console for others to install.
Release the app using the Foundry CLI:
foundry apps release
Choose Major for the change type, select the version you deployed, and fill in the release notes (e.g., “Initial release of an app with a UI extension”).
TIP: You can also do a release in the Foundry UI by going to Foundry > App manager and using Release app from the Actions menu.
This process will make the app available for users in your CID to view in the App catalog. However, it will not install it.
Install the App for Users
Before the users in your organization can use a released application, you have to install it.
Navigate to Foundry > App catalog. Find your newly released app, select the action menu in the bottom right corner, and choose Install. You will be prompted with a dialog explaining permissions required (this app has none) and a disclaimer. Select Save and install.
After the success messages disappear, view your app by going to Endpoint security > Monitor > Endpoint detections again.
In case you’re wondering how versions work, minor and patch releases are updated and installed automatically. Release versions marked major must be accepted manually in the App catalog.
Tips and Tricks
I remember when I was first ramping up on the Falcon platform and can appreciate some of the challenges new developers and integrators might face. The most difficult part for me was testing UI extensions in a developer CID that didn’t have detections or incidents, which meant I needed to find a CID with detections or create my own set for testing. You can do that by following these instructions, if you want to keep your development to the developer CID and reuse these detections for other scenarios. After that, it was smooth sailing.
You can can create pages with the CLI command foundry ui pages create and add them to the main menu (under Custom Apps). The screencast below shows how this works.
You can discover more about the Foundry CLI by passing --help or -h after the command. For example, foundry apps --help or foundry ui -h.
I was also successful in deploying React and Angular apps as UI extensions.

Click here to view the Angular issues I experienced.
Later, I tried adding navigation and sub-pages to my Angular app. When Foundry modified the HTML, it caused the Angular app to use push-based routing instead of the configured hash-based routing. Deleting the <base> tag from the HTML (via Chrome Developer Tools) will resolve this issue.
Learn More about Falcon Foundry
In this post, I just scratched the surface regarding what you can develop using Falcon Foundry. There are many more features that weren’t covered in detail. Here is a brief list of a few components that you should check out:
- API Integrations: Connect your HTTP-based web services or those from a third party to use within Falcon. Import an OpenAPI specification or create the integration from scratch based on URLs and supported authentication types. You can even build a FaaS function (in Go or Python) to manipulate the data from the API.
- Collections: Collections provide a flexible and powerful way to securely store and manage data that you can use in your app. Collections store records (referred to as objects) similar to the way that folders store files. You can use collections to organize related types of data and then retrieve, manipulate, and enrich that data in different ways across your app to create even more meaningful outcomes.
- UI Capabilities: Create extensions for display in detail panels, including CrowdScore incidents, endpoint detections, host management hosts, XDR detections, and workflow executions. You can also create standalone pages that are added to Falcon’s navigation menu.
- Dashboard Builder: Build a dashboard of widgets based on custom queries.
- Workflows and Real Time Response (RTR) Scripts: Build workflow templates to use in your apps and add RTR custom scripts.
There’s a lot to explore and absorb! I’ll be writing about how to use these features in upcoming blog posts. If you’re just getting started with Foundry, I’m on this journey with you, so please let me know if you have questions or issues. I am here to assist!
If you’d like to view the code created in this tutorial, please see @CrowdStrike/foundry-quickstart on GitHub.
Please join our community, read about our SDKs, and learn how to become a CrowdStrike Partner at developer.crowdstrike.com.

Related Content


See CrowdStrike Falcon® in Action
Detect, prevent, and respond to attacks— even malware-free intrusions—at any stage, with next-generation endpoint protection.
See Demo